« Anthrax: Also Available on CD | Home | Getting Your First Tattooth »
Building a PC-Based Studio for Less Than $100 (Part 2)
Topics: Music | Add A CommentBy admin | August 6, 2008
Downloading and Installing dyne:bolic
Downloading and Installing dyne:bolic
This is part II of a series. See part I here.
The Machine
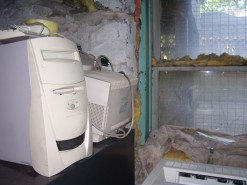 So, there were no organic life forms living in the PC we’re using, which was surprising, given the spider-infested storage area from which the machine was retrieved (see photo). Next, we need to download dyne:bolic. Their download page is a little hard on the eyes. What you’re looking for is either the link that says “download using BitTorrent” (provided you know how to use BitTorrents ) or the section that says “download via ftp from mirrors”. We chose the BitTorrent option, although we aren’t endorsing it; our download still took almost an hour-and-a-half because the torrent wasn’t very well-seeded. You might want to try a regular FTP download.
The Download
![]() The file they offer for download is an ISO file. If you have a decent disc-burning program (like NERO
The file they offer for download is an ISO file. If you have a decent disc-burning program (like NERO), the next step may be as simple as right-clicking the file and selecting Open with > Nero Burning ROM. In any case, you need to burn a disc using the ISO (disc image) file. Once you’ve created the “Live CD”, you should be able to insert in one of your CD/DVD drives, and, if it doesn’t autorun, browse the disc and click “CLICK_ME.HTM”. You’ll find further instructions on how to use the dyne:bolic disc there. Mainly, you need to understand that you’ll be booting your computer from CD with the dyne:bolic disc in your CD/DVD drive, which with some setups means you’ll need to change the boot sequence in the BIOS.
Running the Live CD
 The first time we booted with the Live CD, we got to watch a lot of UNIX-like commands whizzing by as the disc attempted to identify and “mount” all the appropriate hardware and drivers. Everything seemed to work fine, at least to the extent that I can tell if something’s going fine with a super-nerd operating system. Having never seen a Linux-based desktop before, I chose to test it for intuitiveness rather than trying to read manuals. The basic interface, though rather alien to me, gets an A- for usability. The minus is mainly because I found the Hippy-Dippy-Rasta desktop background annoying. In a situation like this I actually prefer something a little more utilitarian. If these developers ever open a Bong shop though, they’re all set.
Non-Epic Fail
Unfortunately, although the Live CD seems to have basically done its job (the few applications we launched at least launched) we ran into a little glitch when we tried to actually use one of them. Although Audacity seemed to be working normally, we couldn’t get it to properly recognize the input signal from the MR-61 Workstation Keyboard we were using to generate some test audio. We had tested the inputs running the system with its installed Windows 98 OS, and it had worked fine (so had Audacity). Back to the drawing board for the moment. You get what you pay for, as they say. Maybe we’ll try the RTFM Protocol.
In part III, we’ll try to resolve these problems and actually test dyne:bolic.